
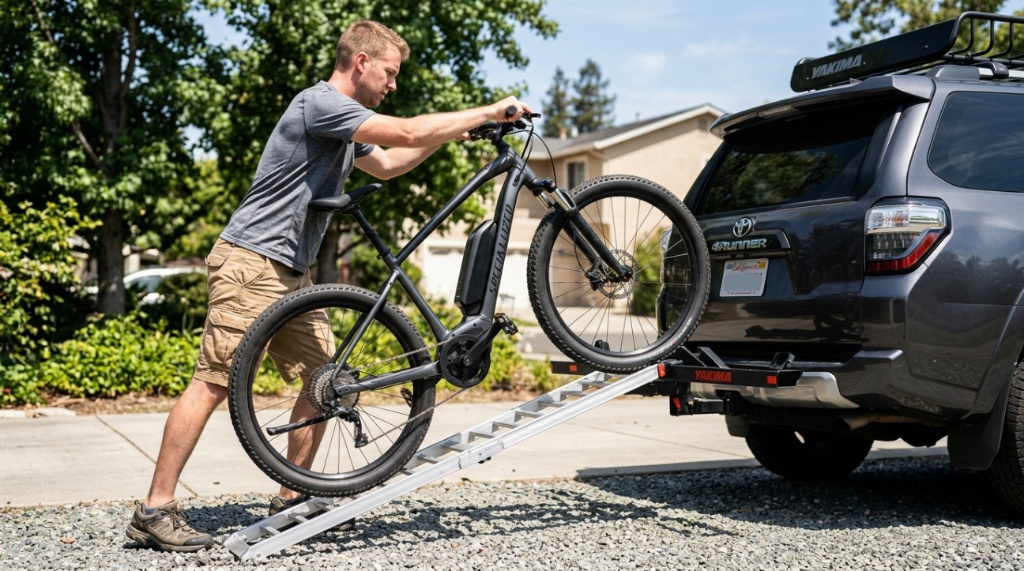
You’ve just invested thousands in a powerful e-bike, and now you’re staring at your hitch rack with a nagging question: will this actually hold my bike at 70 mph? Heavy e-bikes—typically weighing between 50 and 80 pounds—present a unique challenge that standard bike racks simply aren’t designed to handle. The consequences of a failure aren’t just inconvenient; they’re dangerous. This guide walks you through exactly how to secure heavy e-bikes on a hitch rack, covering weight limits, strap techniques, anti-wobble fixes, and the critical mistakes that cause racks to fail.
Why Heavy E-Bikes Fail on Standard Hitch Racks
The physics of carrying a 65-pound e-bike are fundamentally different from carrying a 25-pound road bike. The added mass creates significantly more leverage on the rack’s attachment points, especially when you hit bumps, potholes, or experience highway wind buffeting. Most standard racks are rated for 35–40 pounds per bike, which means your e-bike is already exceeding the design limits before you even start driving.
Beyond the sheer weight, e-bikes have a higher center of gravity due to the battery placement and heavier wheels. This shifts the load dynamics, causing more sway and vertical bounce. When you’re looking for a rack, the stated capacity isn’t just a suggestion—it’s a safety threshold. If you’re trying to secure heavy e-bikes on hitch rack systems that aren’t rated for the load, you’re risking damage to your bike, your vehicle, and other drivers on the road.
Understanding Tongue Weight vs. Rack Capacity
Two separate weight limits matter here. The rack’s per-bike capacity is what most people check, but the tongue weight rating of your vehicle’s hitch receiver is equally important. A Class III hitch typically supports 500–600 pounds of tongue weight, but a Class I or II hitch may only support 200 pounds. If you’re carrying two 70-pound e-bikes, you’re already at 140 pounds, plus the rack’s own weight (often 50–60 pounds), which puts you near the limit of a Class II hitch.
Check your vehicle’s owner’s manual for the specific tongue weight rating. Exceeding this isn’t just a rack issue—it can affect steering, braking, and transmission cooling. If your hitch is undersized, you need to upgrade the receiver before you even think about rack straps.
Step-by-Step Loading Process for Maximum Stability
Proper loading technique matters just as much as equipment. A poorly loaded e-bike can shift even on a high-quality rack. Follow this sequence every time to ensure the load stays put.
Step 1: Remove the Battery (When Possible)
Most e-bike batteries are removable, and taking them off serves two purposes. First, it reduces the bike’s weight by 5–10 pounds, easing the strain on the rack. Second, it protects the battery from road vibration, which can damage internal cells over time. Store the battery inside your vehicle in a padded bag. If your battery is integrated into the frame and not removable, skip this step but be aware that the bike’s full weight is on the rack.
Step 2: Position the Bike on the Rack’s Wheel Trays
Align the front wheel in the designated tray and ensure the rear wheel sits securely in its channel. The bike should sit upright and level. If the rack has adjustable wheel cradles, tighten them so the wheels can’t slide forward or backward. For fat-tire e-bikes, verify that the tray width accommodates your tire size—many standard trays are too narrow for 4-inch fat tires.
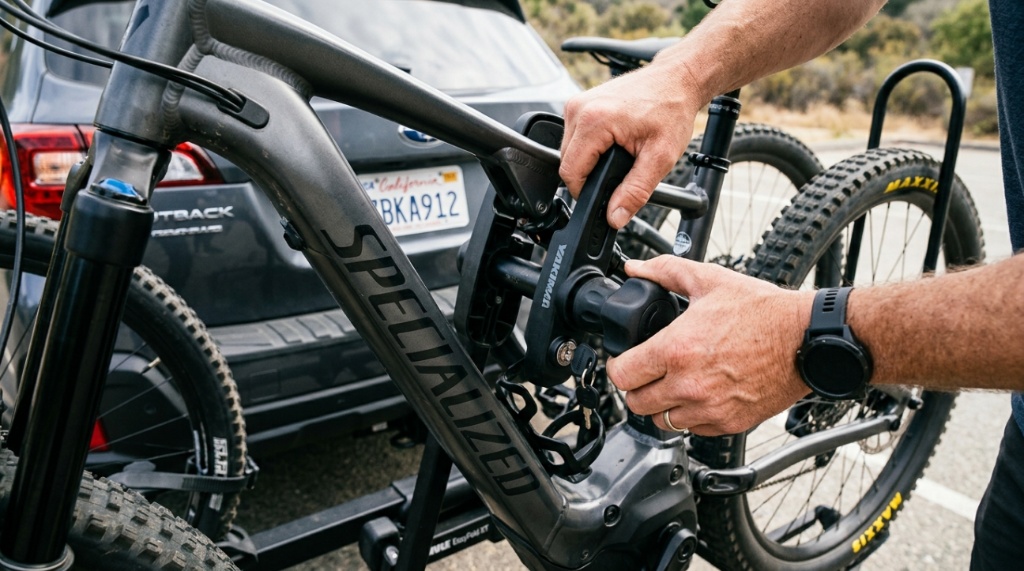
Step 3: Secure the Frame Arm
Most heavy-duty racks use a frame clamp or arm that presses against the top tube. Position the clamp at the center of the top tube, not near the head tube or seat tube where the frame geometry changes. Tighten the clamp until the bike is firmly held, but avoid over-tightening to the point of denting the frame. If your e-bike has a step-through frame, you’ll need a rack with a stabilizing bar or an adapter that provides a straight top-tube surface.
Step 4: Tighten Wheel Straps
Every wheel needs its own strap, and these must be pulled taut. Use the ratchet or cam-lock mechanism to cinch the strap down firmly. A good test: try to lift the bike by the handlebars. If the wheel lifts out of the tray, the strap isn’t tight enough. The bike should feel like it’s part of the rack, not resting on it.
Step 5: Add a Secondary Safety Line
This is the step most people skip, and it’s the one that saves bikes. Use a heavy-duty zip tie or a small bungee cord to create a secondary connection between the bike frame and the rack’s main structure. This isn’t meant to hold the bike—it’s a fail-safe in case a primary strap fails. If a strap snaps, the safety line keeps the bike from bouncing off the rack entirely,Planning your next outdoor trip? Check out our guide on the best Types of Bikes to Rent for Your Ride before hitting the road.
Anti-Wobble Solutions for Hitch Racks
Even a properly loaded e-bike can wobble if the rack itself is loose in the hitch receiver. The standard pin-and-clip system leaves room for movement, and that movement amplifies with heavier loads. An anti-wobble device is not optional for e-bikes—it’s essential.
There are two main types: bolt-on stabilizers that replace the pin, and wedge-style clamps that tighten from the side. Both work by eliminating the gap between the rack’s shank and the inside of the receiver. Install the anti-wobble device before loading the bikes, then re-tighten it after the bikes are on the rack. The added weight can shift the rack’s position slightly, so a final tightening pass makes a real difference.
When to Use a Hitch Extension
If your vehicle has a spare tire mount or a rear door that swings open, you might be tempted to use a hitch extension to create clearance. Avoid this with e-bikes. Every extension adds leverage and increases the moment arm, which multiplies the stress on the hitch and the rack. The result is more sway and a higher risk of failure. If you need clearance, look for a rack with a built-in tilting or pivoting mechanism instead of using an extension.
Weight Distribution: Two-Bike Scenarios
Carrying two e-bikes changes the dynamics significantly. The total weight approaches 130–160 pounds, and how you distribute that weight across the rack matters. Place the heavier bike closest to the vehicle. This reduces the leverage on the rack’s arms and keeps the center of gravity closer to the hitch point. The lighter bike goes on the outer position.
If your rack has independent arms, adjust them so both bikes are at the same height. A bike that sits higher than the other creates an uneven load that increases sway. Also, be mindful of handlebar and pedal overlap—if the bikes are too close, they can hit each other during transit, causing scratches or worse.
Maintenance Checks Before Every Trip
Racks and straps wear out, and e-bike weight accelerates that wear. Before every trip, inspect the following:
- Straps: Look for fraying, cuts, or UV damage. Replace any strap that shows signs of wear—don’t wait for it to fail.
- Ratchet mechanisms: Ensure they click and release smoothly. A sticky ratchet can prevent you from getting the strap tight enough.
- Frame clamps: Check the rubber padding for cracks. Exposed metal can scratch your bike’s frame.
- Hitch pin and bolt: Verify they’re tight and free of rust. A corroded pin can shear under load.
- Wheel trays: Look for cracks or deformation, especially around the wheel cradle areas.
These checks take two minutes and can prevent a catastrophic failure on the highway. If you notice any component that feels loose or looks damaged, replace it before riding with your e-bike.
Common Mistakes That Lead to E-Bike Damage
Even experienced cyclists make errors when hauling e-bikes. Here are the most frequent mistakes and how to avoid them.
Over-Tightening Straps
It’s natural to want everything as tight as possible, but over-tightening wheel straps can warp rims, especially on e-bikes with spoke wheels. The strap should hold the tire firmly without crushing the rim. If you hear creaking or see the rim flexing, back off the tension slightly.
Ignoring the Display Unit and Cables
E-bike displays, throttle cables, and brake lines are exposed and fragile. When you strap the bike down, make sure no cables are pinched between the frame and the rack’s clamp. A pinched cable can cause electrical shorts or brake failure. Route cables away from all contact points before tightening anything.
Forgetting to Lock the Rack to the Vehicle
Most hitch racks have a locking mechanism that secures the rack to the receiver. Use it. Beyond theft prevention, the lock adds an extra layer of mechanical security that prevents the rack from vibrating loose over long distances.
Frequently Asked Questions
Can I use a standard bike rack for a 60-pound e-bike?
No. Standard racks are typically rated for 35–40 pounds per bike. Exceeding this rating risks rack failure, bike damage, and road hazards. You need a rack specifically rated for heavy e-bikes, usually 60–80 pounds per bike.
Should I remove the battery before loading my e-bike?
Yes, whenever possible. Removing the battery reduces weight by 5–10 pounds and protects the battery from road vibration. Store the battery securely inside your vehicle during transit.
How tight should the wheel straps be?
Straps should be tight enough that the wheel cannot lift out of the tray when you pull upward on the bike. However, avoid over-tightening to the point where the strap compresses the rim or tire sidewall excessively.
What is an anti-wobble device and do I need one?
An anti-wobble device eliminates the gap between the rack’s shank and the hitch receiver, reducing sway and movement. For heavy e-bikes, it’s highly recommended because the added weight amplifies any looseness in the connection.
Can I carry two e-bikes on a hitch rack?
Yes, but only if the rack is rated for the combined weight of both bikes. Place the heavier bike closest to the vehicle and ensure your hitch’s tongue weight rating is sufficient for the total load.
Conclusion
Securing heavy e-bikes on a hitch rack comes down to three things: using equipment rated for the weight, loading the bike correctly, and performing regular maintenance. Remove the battery when you can, tighten every strap methodically, and always use an anti-wobble device. Check your hitch’s tongue weight rating before you load up, and inspect your straps and clamps before every trip. These steps take a few extra minutes but make the difference between a safe journey and a disaster on the highway. Invest in quality gear, follow the loading sequence every time, and your e-bike will arrive exactly where you left it—secure and undamaged.

