Winter is coming, and your outdoor jacuzzi needs your attention before the first freeze hits. According to the Association of Pool and Spa Professionals, improper winterization causes over 30% of all hot tub repair claims every year. Learning how to winterize an outdoor jacuzzi correctly can save you hundreds, even thousands, of dollars in avoidable damage. This guide walks you through every step with clear, practical instructions so your spa comes out of winter in perfect condition. We suggest visiting the laser hair removal in midtown Manhattan.
Why Winterizing Your Outdoor Jacuzzi Matters More Than You Think
Skipping the winterization process is one of the most expensive mistakes a jacuzzi owner can make. When water freezes inside the plumbing lines, it expands and can crack pipes, pumps, and heater components beyond repair. A single freeze event can cause damage that costs $1,500 or more to fix. Taking two to three hours now protects your entire investment for the season ahead. Simply put, prevention is always cheaper than repair.
Frozen water does not care how new or expensive your jacuzzi is. Even high-end models with thick insulation are vulnerable when temperatures consistently drop below 32°F. Many homeowners mistakenly believe that leaving the heater running is a safe solution, but power outages during winter storms can still leave your spa exposed. The only truly reliable method is a full, proper winterization. Every step in this process exists for a very good reason. Visit the best anti aging facial in midtown Manhattan to get the best care for anti aging.
How to Winterize an Outdoor Jacuzzi: Tools and Supplies You Need First
Before you begin, gather everything you need so the process flows smoothly without interruption. Having your supplies ready ahead of time prevents costly mistakes that happen when you rush or improvise. Here is a complete list of what to prepare:
- Submersible pump or wet/dry vacuum (for draining water)
- Garden hose (to flush lines)
- Non-toxic antifreeze (propylene glycol, NOT automotive antifreeze)
- Phillips and flathead screwdrivers
- Spa flush product or line cleaner
- Clean towels and a sponge
- Plastic wrap or waterproof cover
- Rubber gloves and eye protection
Quality non-toxic antifreeze is essential for any remaining water in the lines. Propylene glycol is safe for spa plumbing and will not damage seals or components. Never use ethylene glycol-based automotive antifreeze, which is toxic and will ruin your equipment. Once you have everything ready, the actual process becomes straightforward and manageable. Preparation is truly half the battle.
Step-by-Step Process to Winterize an Outdoor Jacuzzi
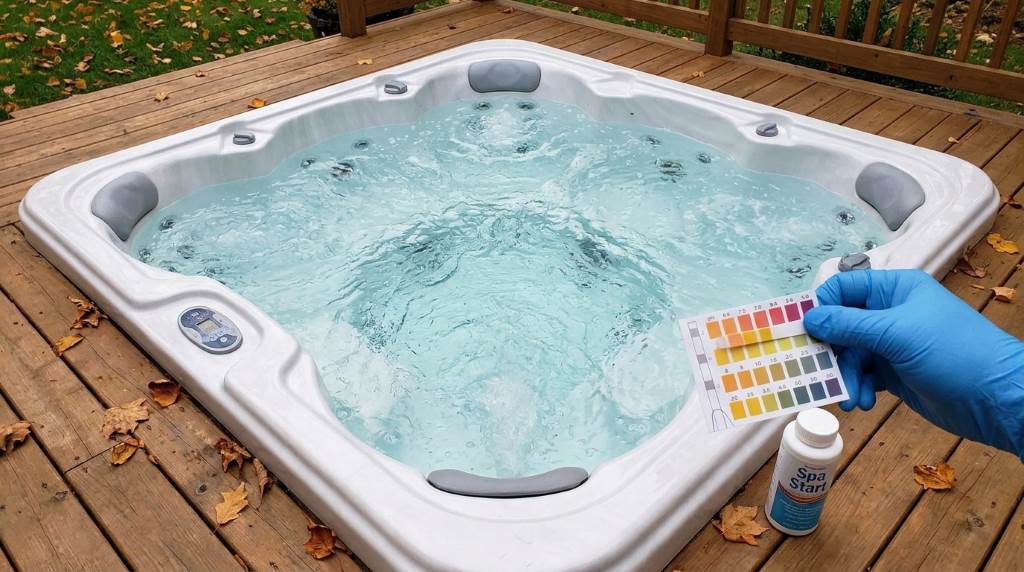
Step 1: Balance and Flush the Water Chemistry
Start the winterization process at least one to two days before draining by balancing your water chemistry. Add a spa flush product to the water and run the jets for 30 minutes to push out biofilm and buildup from inside the plumbing lines. This step prevents mold, mildew, and bacteria from settling into your pipes during the off-season. After flushing, turn off the heater and let the water cool to a safe temperature before draining. Skipping this step means you could reopen a jacuzzi full of unpleasant surprises in spring.
Step 2: Completely Drain the Jacuzzi
Turn off all power to the jacuzzi at the circuit breaker before you begin draining. Connect a submersible pump or garden hose to the drain valve at the base of the spa and pump all water out completely. Most jacuzzis take 30 to 60 minutes to fully drain, depending on their size and the pump you use. Once the main basin is empty, open all the drain plugs on the equipment panel to release water trapped in the pumps and heater. Do not leave even a small amount of standing water behind, as it will freeze and expand.
Step 3: Blow Out the Plumbing Lines
This step is critical and one that many DIY winterizers miss entirely. Use a wet/dry shop vacuum on the blow setting to force air through every jet and plumbing line in the jacuzzi. Move from jet to jet systematically, working your way around the entire tub to clear water from every section of pipe. Pay special attention to the footwell jets and any low-lying lines where water tends to pool. Even a small pocket of trapped water can freeze and crack a fitting or manifold during a hard freeze.
Step 4: Remove and Store Filters
Pull out all cartridge filters from their housing and rinse them thoroughly with a garden hose. Inspect each filter for tears, damage, or heavy mineral deposits before deciding whether to store or replace it. Store clean, undamaged filters indoors in a dry location away from freezing temperatures. Leaving filters in the jacuzzi during winter exposes them to freeze-thaw cycles that shorten their lifespan significantly. Starting spring with clean, properly stored filters means your jacuzzi will be ready to run faster when you reopen it.
Step 5: Add Non-Toxic Antifreeze to Remaining Lines
Even after blowing out the lines, small amounts of water can remain trapped in low spots or valves. Pour non-toxic propylene glycol antifreeze directly into the jet openings and the filter housing to protect those residual pockets. Use approximately one quart per plumbing circuit, following the product label for exact measurements. This step gives you a vital layer of insurance against unexpected hard freezes or power outages during the off-season. It is an inexpensive step that provides significant peace of mind throughout the winter months.
Step 6: Protect the Equipment Cabinet
Open the equipment cabinet and inspect all components including the pump, heater, and blower for any visible signs of moisture. Use clean towels to wipe down surfaces and remove any standing water from the cabinet floor. Leave the equipment cabinet door slightly ajar or ensure it has ventilation to prevent moisture buildup that leads to mold and corrosion. Some owners choose to place moisture-absorbing packets inside the cabinet for added protection during long, humid winters. Taking care of the equipment bay is just as important as protecting the shell and plumbing.
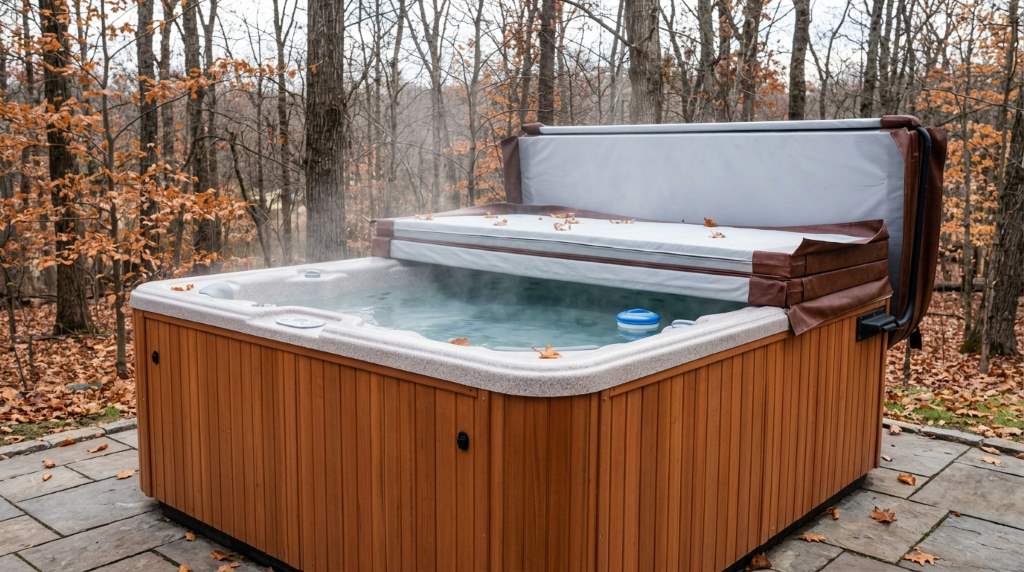
Step 7: Cover Your Jacuzzi Properly
A high-quality, well-fitting cover is your outdoor jacuzzi’s first line of defense against winter weather. Secure the cover tightly using the locking straps or clips to prevent wind from lifting it and exposing the shell to freezing temperatures and debris. If your existing cover is cracked, waterlogged, or torn, replace it before winter arrives. A damaged cover allows moisture to seep in and can add hundreds of pounds of ice and water weight that strains the cabinet structure. Consider adding a cover cap or thermal blanket underneath for added insulation in very cold climates.
Common Mistakes to Avoid When Winterizing Your Jacuzzi
Many homeowners make small errors that lead to big problems when spring arrives. Knowing what to avoid is just as valuable as knowing what to do correctly. Here are the most common mistakes:
- Leaving water in the pump housing because it is difficult to access
- Using automotive antifreeze instead of spa-safe propylene glycol
- Forgetting to turn off the circuit breaker before draining
- Skipping the line blowout and relying only on antifreeze
- Storing the cover outdoors where moisture and debris degrade it
- Failing to drain the heater manifold completely
- Leaving the spa cover unlocked during high wind events
Each of these mistakes is easy to make and equally easy to avoid with proper preparation. Review this list before you start and check each item off as you complete your winterization process. A thorough job now means a smooth reopening in spring with no costly surprises waiting for you.
How to Know When Winterization Is Truly Complete
After finishing every step, do a final walkthrough to confirm everything is in order. Visually check every jet opening to make sure no water is dripping or pooling inside the shell. Verify that the circuit breaker is off and confirm the cover is securely fastened with no gaps or loose straps. Check the equipment bay one last time to make sure all drain plugs are removed and no water remains. When every item on your checklist is complete, your jacuzzi is fully protected and ready for winter.
Reopening Your Jacuzzi After Winter: A Quick Overview
Knowing how to winterize an outdoor jacuzzi properly also means planning for an easy spring reopening. When temperatures consistently stay above 50°F, reinstall your drain plugs, replace your filters, and refill the spa with fresh water. Balance the water chemistry carefully before running the jets, and inspect all components for any signs of winter damage. Running a spa flush product again before your first soak will remove any residue from the antifreeze and any biofilm that developed during storage. A well-winterized jacuzzi typically starts up in spring with zero issues.
Conclusion
Learning how to winterize an outdoor jacuzzi is a skill every spa owner needs to master before temperatures drop. The process takes only a few hours but protects thousands of dollars in equipment from preventable freeze damage. Follow each step in this guide carefully, use the right materials, and never skip the line blowout or antifreeze treatment. Your jacuzzi will thank you when spring arrives and it fires up perfectly on the very first try. Take action today, before the first freeze sneaks up on you and turns a simple chore into an expensive repair. Finally, we recommended the best facials in midtown Manhattan and the best manicure in midtown Manhattan to know more details.